-
EL HAJJIOUI Nabil authoredUnverified8f3ce6bb
- VitamUI
- Install Vitam locally
- Launch Vitam services using your IDE and docker for COTS
- Launch Vitam services using Vitam Virtual Machine
- 1 - Steps after downloading the VITAM VM
- 1a - Starting checks
- Import the VM to VirtualBox
- Configure network to NAT
- Vitam port redirections
- access the VM
- Vitam main interface
- consul
- 1b - Get SSL certificate from the store
- 1b - Try to access the Vitam from local
- 1c - Configure VITAMUI to access Vitam APIs
- Copie VITAM configuration files and necessary certificates to VITAMUI modules
- Upgrading PKI (Public Key Infrastructure) in case of Certificates expiration:
- Modifying the configuration file:
- Regenerating the vitam PKI:
- Pushing the new PKI generate:
- Reboot the VM
VitamUI
Install Vitam locally
There is two ways (for now) for starting VITAM in an development mode in order to make requests to external APIs from VitamUI:
Launch Vitam services using your IDE and docker for COTS
the first way is launching Vitam locally with IDEs and docker images etc... refer to the directory named vitam-conf-dev
at Vitam configuration for devs, don,t forget to choose the compatible
version of vitam you want to use to follow compatible configurations.
Launch Vitam services using Vitam Virtual Machine
This is the recommanded way for starting development with VITAMUI with a virtualized VITAM. each relese of VITAM, a virtual machine is created and published. to download a specific version (example 2.15.3) of VITAM virtual machine, see
⚠ **Vitam uses Java 11, since 3.0.x **: Be careful when choosing the VM to download.
1 - Steps after downloading the VITAM VM
After downloading the VITAM Virtual Machine, launch it using either VirtualBox or VM Ware below the process to launch the VM with VirtualBox
1a - Starting checks
Import the VM to VirtualBox
dans virtualBox , Fichier > Importer un appareil virtuel
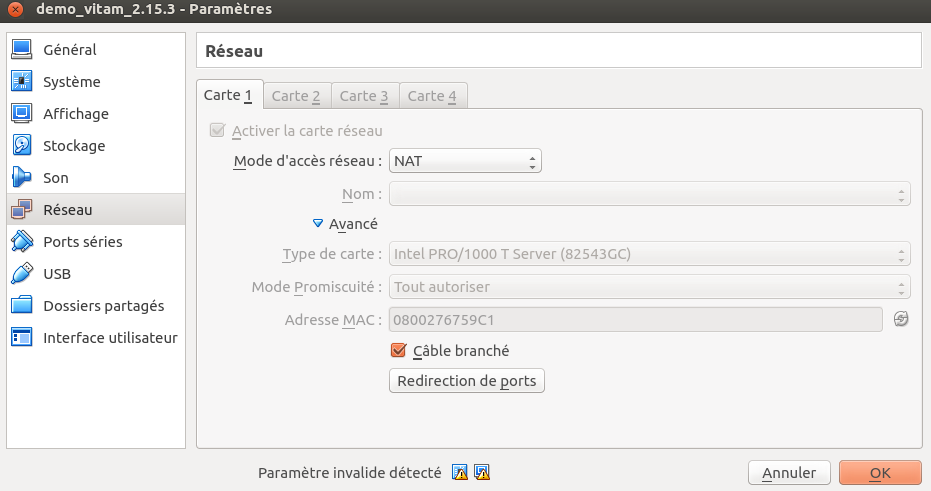
Configure network to NAT
Vitam port redirections
The redirection of vitam external endpoints ports

access the VM
the default shel users:
- demo/demo
- root/packer
Vitam main interface
the main interface for all vitam services are accessible with : localhost:8000
consul
The consul interface for service discovery is accessible at http://localhost:8000/ui/demo/services
1b - Get SSL certificate from the store
to make HTTPS request to VITAM Endpoints, you should get the .crt and .key certificates.
To do so, download the keystore from this link localhost:8000/nodes/vitam-env-vm-demo.vitam-env/browse/conf/ihm-demo/
or execute the command below:
bash$ wget localhost:8000/nodes/vitam-env-vm-demo.vitam-env/browse/conf/ihm-demo/keystore_ihm-demo.p12
store it in a working directory, after that, we should extract private kay and certificate from that keystore.
To do so execute the two commands:
- extract the private key:
bash$ openssl pkcs12 -in keystore_ihm-demo.p12 -out key.pem -nocerts -nodes
- extract the public key:
bash$ openssl pkcs12 -in keystore_ihm-demo.p12 -out crt.pem -clcerts -nokeys
1b - Try to access the Vitam from local
get your IP adress with ifconfig command or with the command hostname -i.
- sending HTTPS curl request:
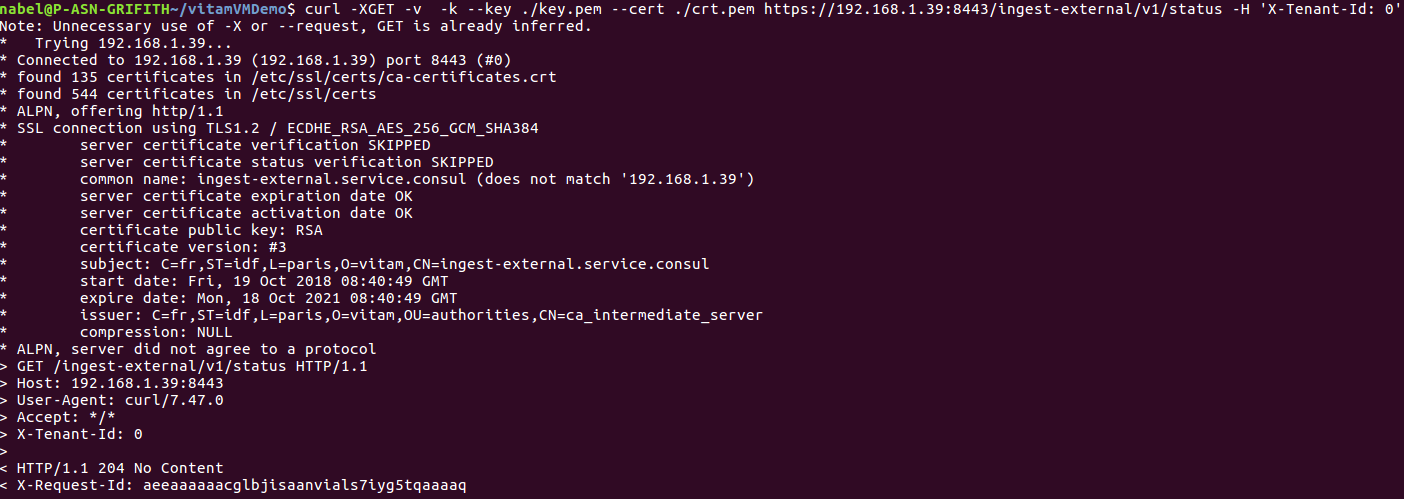
we are going to send an example request to VITAM external endpoint, for example we'll choose VITAM Ingest External API.
Vitam is responding with an X-Request-Id as we see in the screen above.
use this request to reproduce it in your local:
bash$ curl -XGET -v -k --key ./key.pem --cert ./crt.pem https://@yourIP:8443/ingest-external/v1/status -H 'X-Tenant-Id: 0'
--key ./key.pem and --cert ./crt.pem are the private and the public key extracted at the previous step.
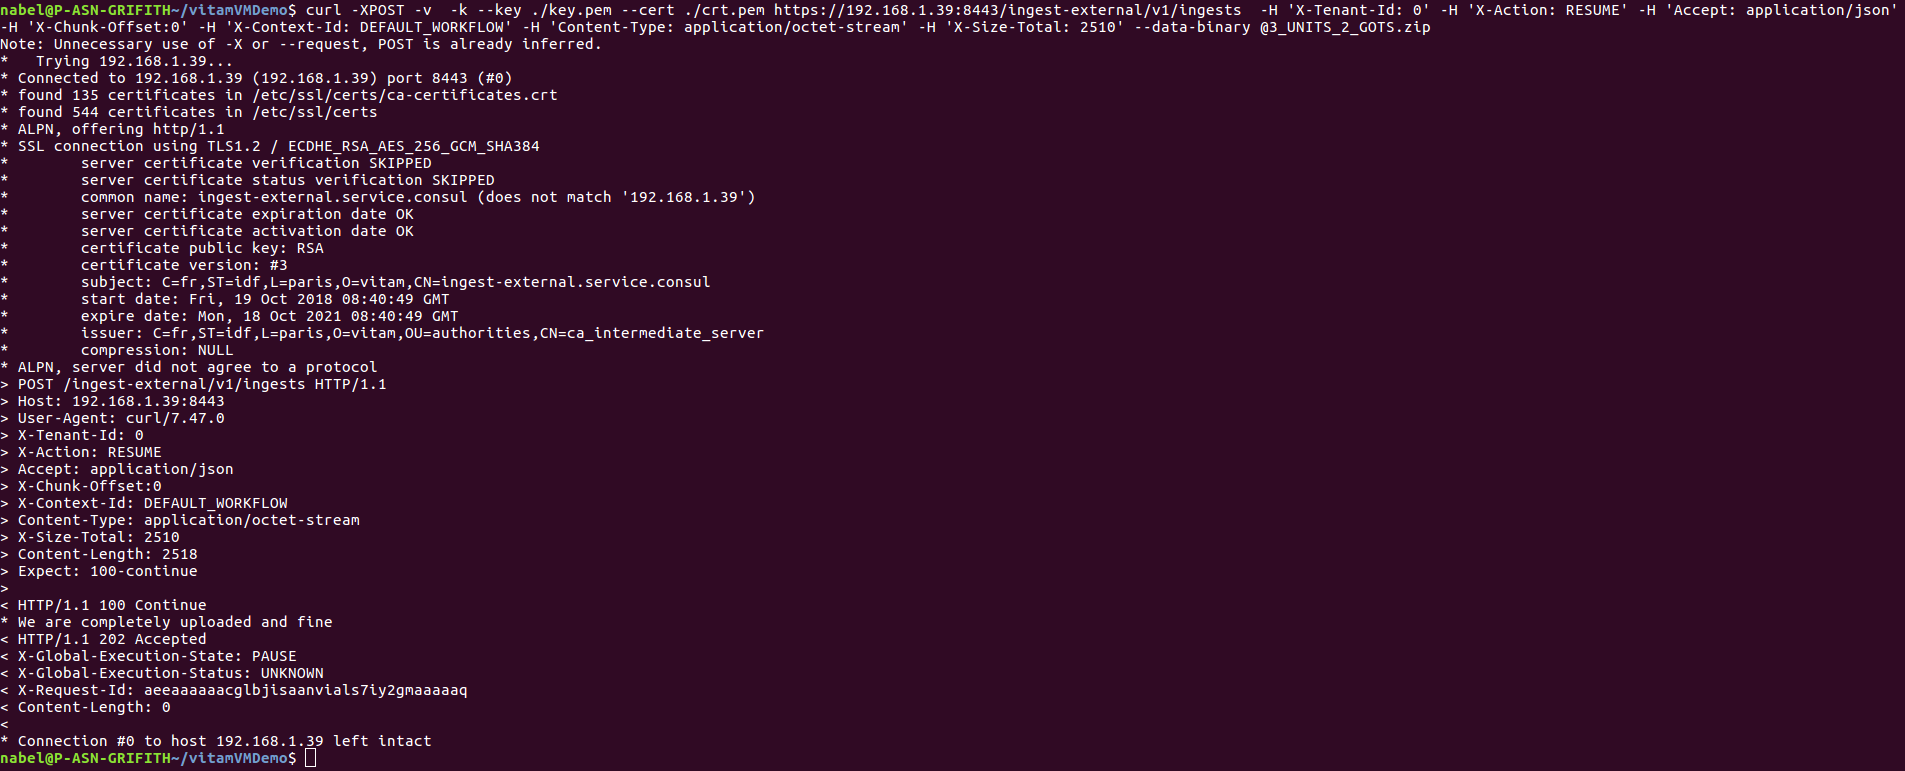
- example of sending an SIP to VITAM In this step we are going to send a real SIP to VITAM, see the screen example
use this request to reproduce it in your local:
bash$ curl -XPOST -v -k --key ./key.pem --cert ./crt.pem https://@yourIP:8443/ingest-external/v1/ingests -H 'X-Tenant-Id: 0' -H 'X-Action: RESUME' -H 'Accept: application/json' -H 'X-Chunk-Offset:0' -H 'X-Context-Id: DEFAULT_WORKFLOW' -H 'Content-Type: application/octet-stream' -H 'X-Size-Total: size (verify size of sip.zip)' --data-binary @path/to/some/valid/sip.zip
⚠ change@yourIP,X-Size-Totaland thepath/to/some/valid/sip.zipbefore launching the command
1c - Configure VITAMUI to access Vitam APIs
The final Step is to configure VITAMUI modules that interacts with VITAM.
Untill now there is two modules that interacts with VITAM endpoints,
the IAM module and the Ingest module. specifically the IAM-Internal and Ingest-Internal modules.
Copie VITAM configuration files and necessary certificates to VITAMUI modules
Under the conf directory of this two modules, a directory called vitam-dev directory for dev purposes as it's name indicate.
at this level you should copy 4 necessary files:
-
access-external-client.conflocalhost:8000/nodes/vitam-env-vm-demo.vitam-env/browse/conf/ihm-demo/access-external-client.conf -
ingest-external-client.conflocalhost:8000/nodes/vitam-env-vm-demo.vitam-env/browse/conf/ihm-demo/ingest-external-client.conf -
keystore_ihm-demo.p12localhost:8000/nodes/vitam-env-vm-demo.vitam-env/browse/conf/ihm-demo/keystore_ihm-demo.p12 -
truststore_ihm-demo.jkslocalhost:8000/nodes/vitam-env-vm-demo.vitam-env/browse/conf/ihm-demo/truststore_ihm-demo.jks
copy them to the vitam-dev directory of the two modules.
these files are accessible here : localhost:8000/nodes/vitam-env-vm-demo.vitam-env/browse/conf/ihm-demo
Upgrading PKI (Public Key Infrastructure) in case of Certificates expiration:
In your virtual machine, go to path /code/deployment/
Modifying the configuration file:
Modify the file environments/vitam_pf_vars.yml, comment the line admin_context_certs
Regenerating the vitam PKI:
To do that, execute the following command lines :
-
Generate the CA (Certificate Authorities):
bash$ ./pki/scripts/generate_ca.sh true -
Generate new Certificates
bash$ ./pki/scripts/generate_certs.sh environments/hosts.demo true -
Generate the keystores (truststores, keystores, p12 and jks):
bash$ ./generate_stores.sh true
Pushing the new PKI generate:
Push the new PKI generated in the previous step, by executing the following commands, always from /code/deployment location
-
bash$ ansible-playbook ansible-vitam/vitam.yml -i environments/hosts.demo --vault-password-file vault_pass.txt -e confirmation=yes --tags update_vitam_certificates --extra-vars=@environments/vitam_pf_vars.yml --extra-vars=@environments/environments_vars.yml -
bash$ ansible-playbook ansible-vitam-extra/extra.yml -i environments/hosts.demo --vault-password-file vault_pass.txt -e confirmation=yes --tags update_vitam_certificates --extra-vars=@environments/vitam_pf_vars.yml --extra-vars=@environments/environments_vars.yml
update_vitam_certificates is an ansible tag the will target the specific locations to update only certificates.
Reboot the VM
Restart the VM, and check that all the services are up'running in consul, and check that stores are updated in services at /vitam/conf/{vitam-service-name}


